
Inflatable Brace
3.0 Videos
Inflation/Deflation Explanation
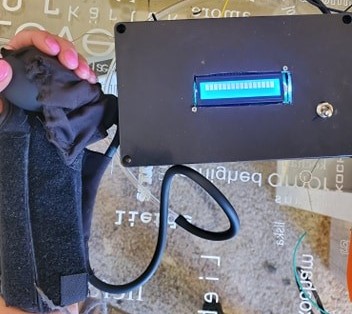
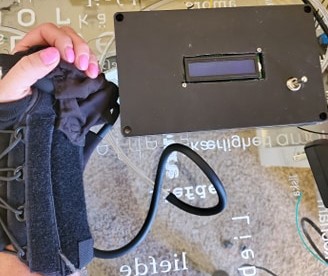
External User Interface
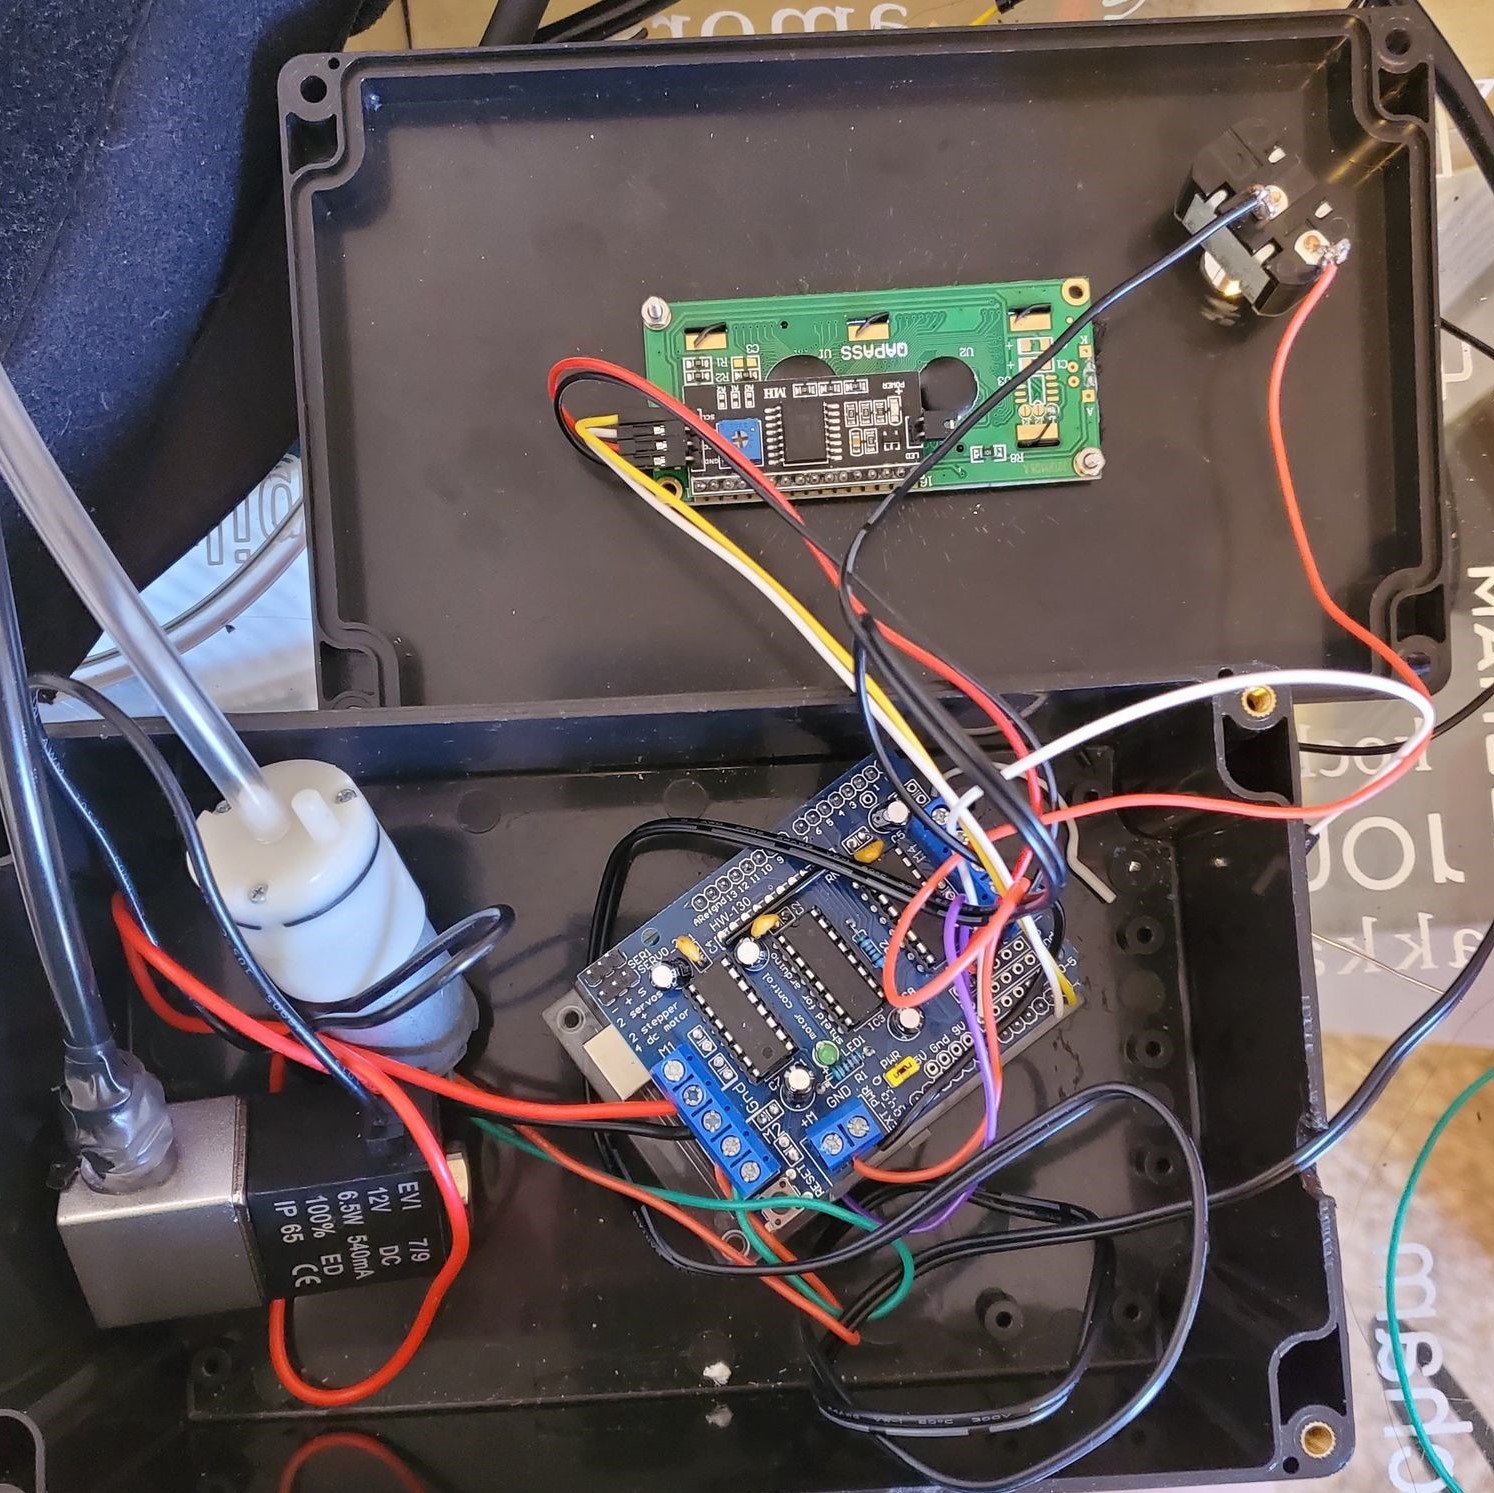
Internal Wiring
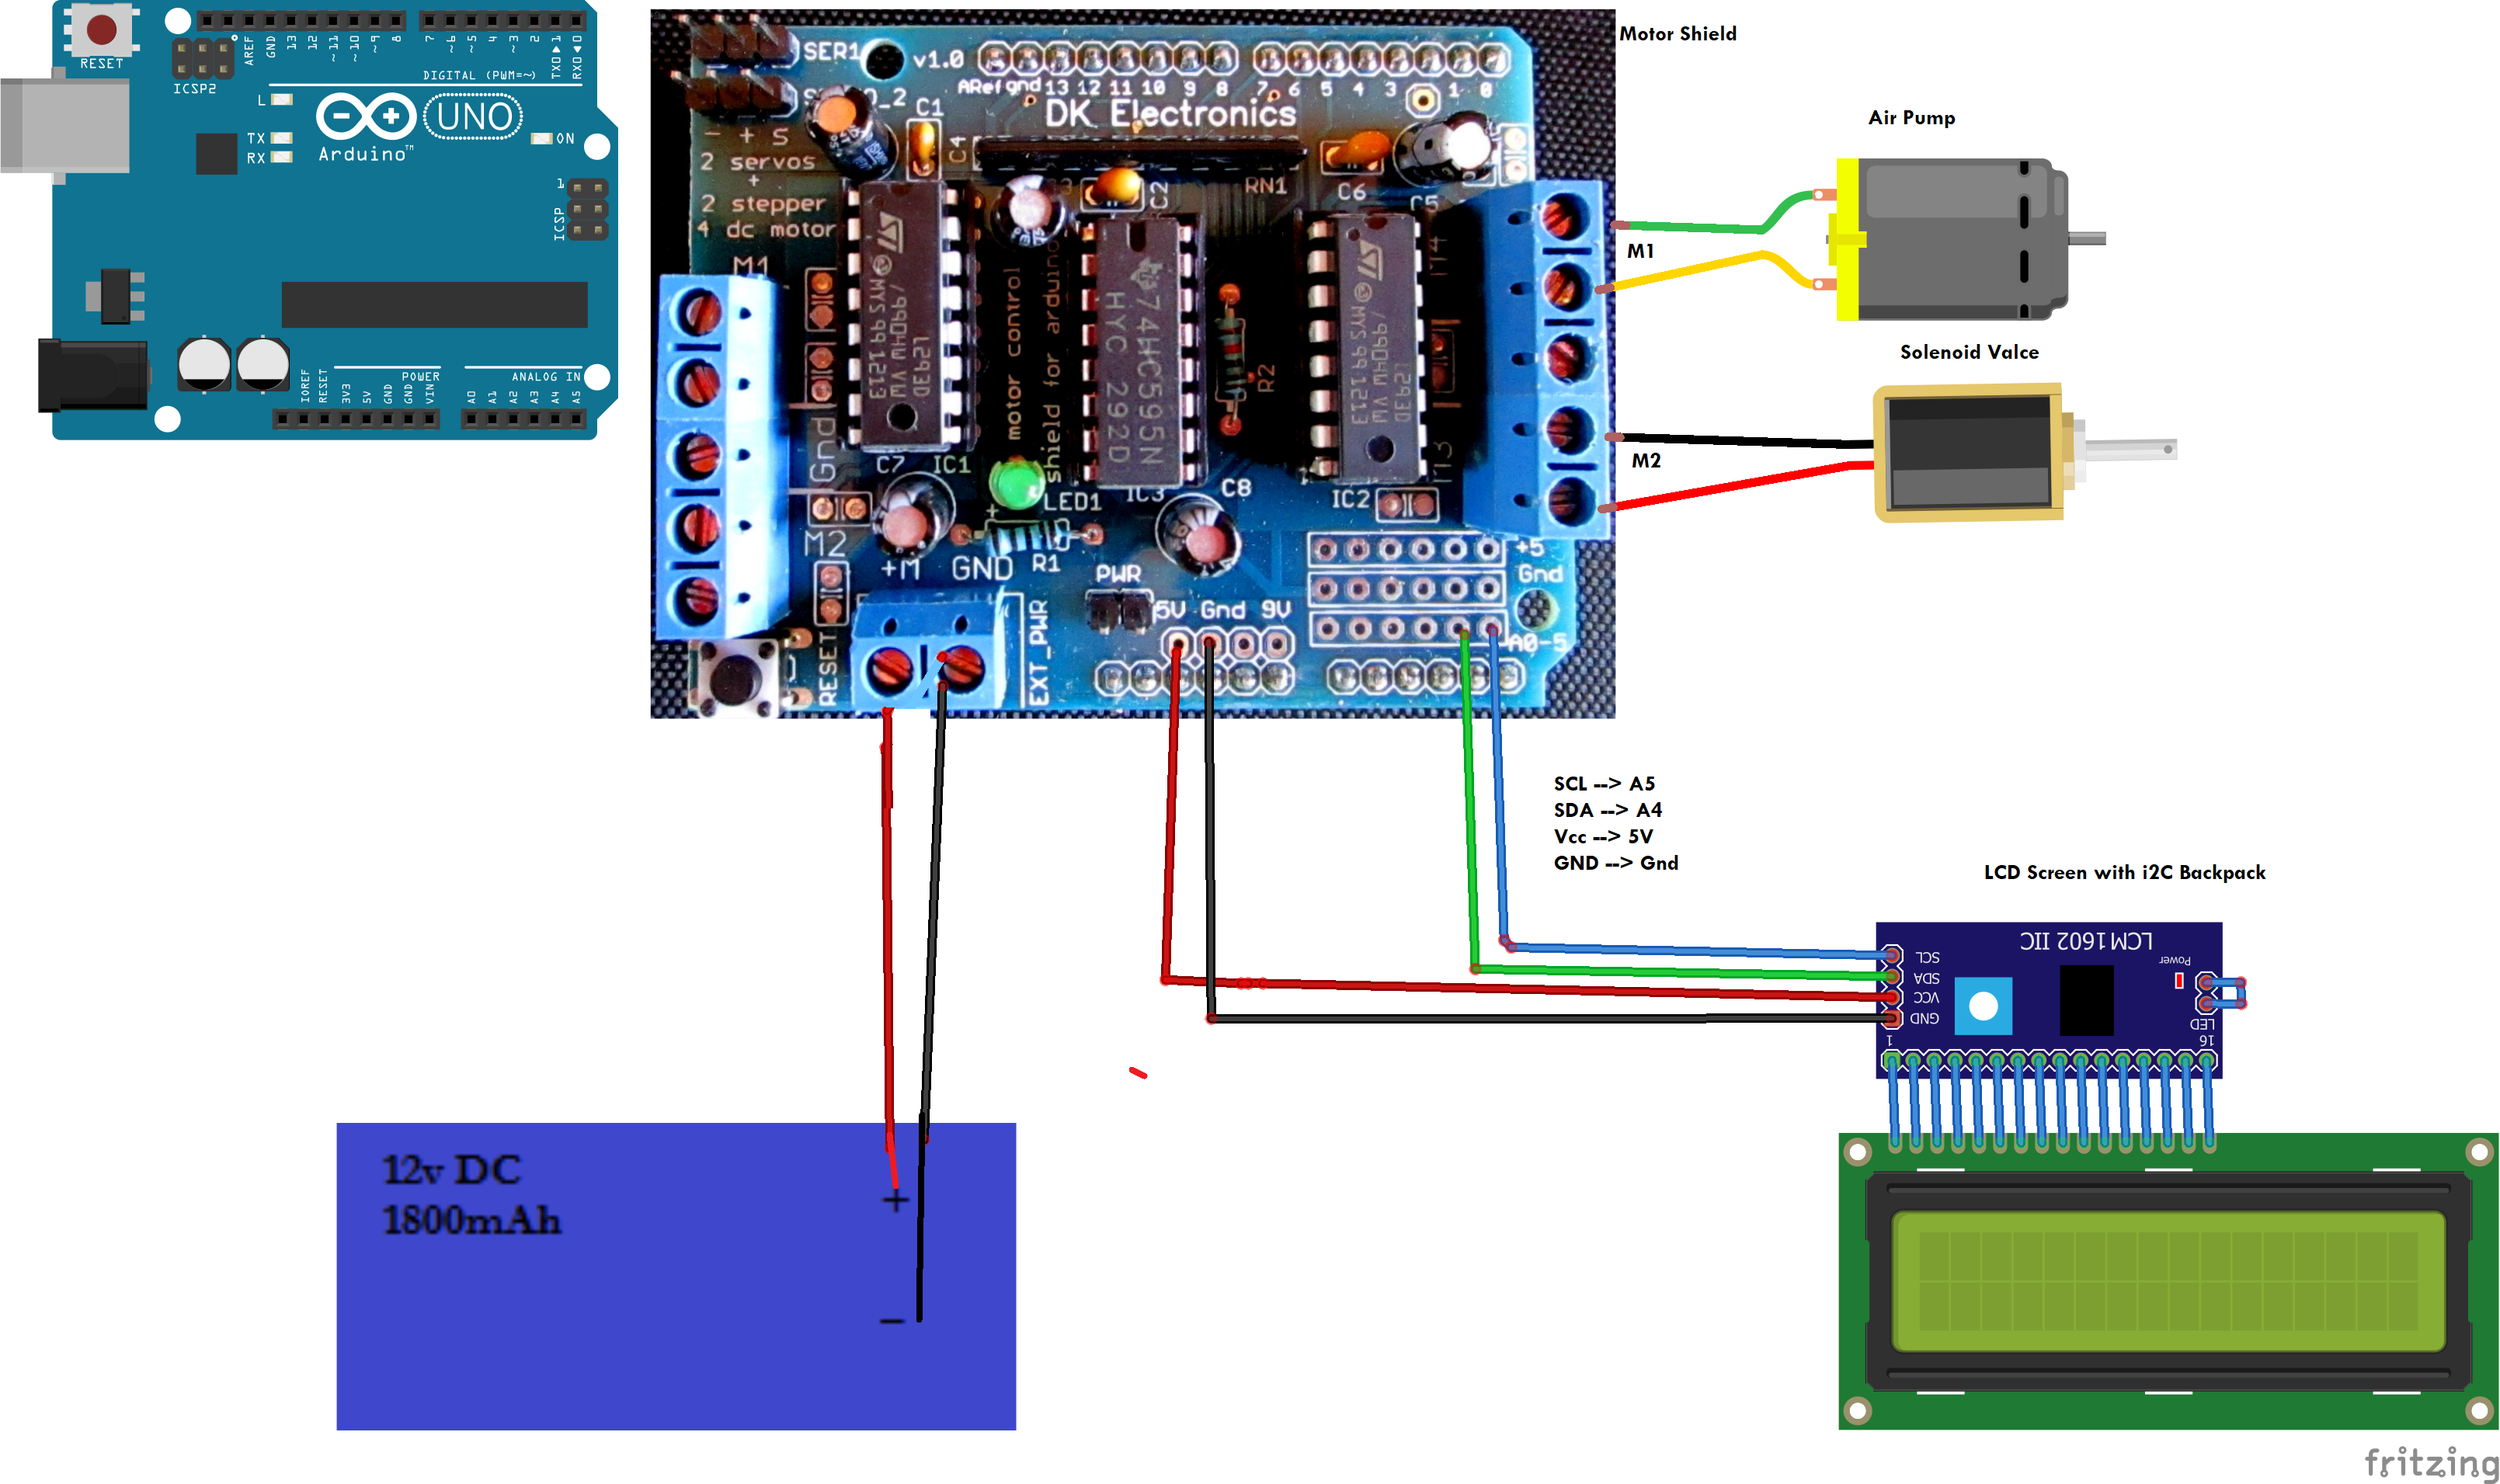
Circuit Diagram
#include  //needed to drive motor
#include  //needed for circuits
#include  //needed w LCD i2C Library


AF_DCMotor pump(2, MOTOR12_64KHZ); // create motor #1, 64KHz pwm for greater inflation power

AF_DCMotor vacuum(1, MOTOR12_8KHZ); // create motor #2, 8KHz pwm


LiquidCrystal_I2C lcd(0x27, 16, 2);
 //LCDvariablename(address [use find_lcd_screen_address program to locate], 16x2 characters)


void setup() {
  Serial.begin(9600); //begin serial communication (9600 for LCD)
  lcd.begin();//Initializing display
  lcd.backlight();//To Power ON the back light NOTE: if backlight doesn't turn on,
//  ensure power jumper is attached
  lcd.setCursor(0,0); //use first row
  lcd.print("    WELCOME     ");  //print mode
  pump.setSpeed(255);  // Set motor 1 to maximum speed
  vacuum.setSpeed(200);  // Set solenoid valve to maximum speed
  delay(100); //delay
  }

//The following loop runs forever
void loop() {
  lcd.clear();
  vacuum.run(FORWARD); //release the solenoid valve
  lcd.setCursor(0,0); //use first row
  lcd.print("    INFLATING     ");  ////print state of device (inflating)
  pump.run(FORWARD);      // turn on pump
  delay(8000); //run for 5000ms
  pump.run(RELEASE); //detach the motor to conserve power
  lcd.clear(); //clear the screen
  lcd.setCursor(0,0); //use first row
  lcd.print("     HOLDING     ");  //print state of device (pausing on inflation)
  delay(2000); //delay 5000ms
  lcd.clear(); //clear the screen
  lcd.setCursor(0,0); //use first row
  lcd.print("    DEFLATING     ");  //print state of device (deflating)
  vacuum.run(BACKWARD);      //reverse polarity on solenoid valve (since it is normally closed,
  //ground will keep it closed)
  delay(1000); //allow 1s to release pressure
  vacuum.run(FORWARD); //release the solenoid valve
  delay(500); //delay .5 second

}